Implementing Let's Encrypt
Updated Now that Let's Encrypt is in public beta I've updated this to suit.
These are exciting times for the web. Secure connections have been around for a long time and are now expected and trusted by the public. Unfortunately they're also very expensive, usually around $99 per year.
But huzzah and hooray, we now have Let's Encrypt, a service from the EFF, Mozilla, Cisco and others to provide FREE TLS encryption for any website. You can read more about the mission here: https://letsencrypt.org/about/
At the moment the service is in public beta which means they're still ironing out the bugs, but it's currently serving tens of thousands of certs and seems to be holding up fine.
For the purposes of this little walk-through I'm using Ubuntu 14.10 and Nginx.
One of the goals of Let's Encrypt is that it be automatic. In time this will include configuring the server too (be that Apache, Nginx, or another) and it already does a pretty good job but there's definitely more work to do.
I'm going to show how get just the cert files and configure Nginx manually. So to start with clone the Let's Encrypt software somewhere, I put it in my home directory:
git clone https://github.com/letsencrypt/letsencrypt
Ideally before the next step make sure you stop any service using port 80. There is a 'webroot' option to circumvent this and you can read more on the How it works page. But in my case I'm happy killing Nginx for a couple of minutes:
sudo service nginx stop
Now cd in to the new directory and run the software with the following parameters:
cd letsencrypt
./letsencrypt-auto certonly
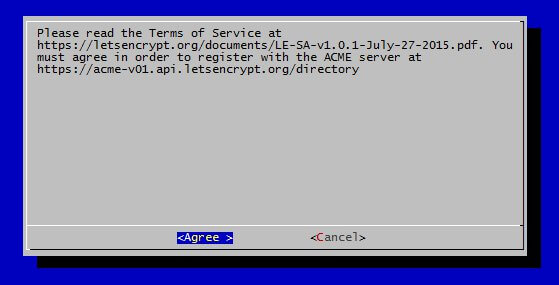
The first time you run the program it will ask for an email address and ask that you agree with the T's and C's.


Finally it will ask for your domain(s). Separate these either with a space or a comma.

That's it! If all goes well the necessary files will be created here: /etc/letsencrypt/live/<yourdomain>/
To add to Nginx, add or change your sites-available file to look like this:
server {
    listen 443 ssl;
    server_name lewiswalsh.com;
    ssl_certificate     /etc/letsencrypt/live/lewiswalsh.com/fullchain.pem;
    ssl_certificate_key /etc/letsencrypt/live/lewiswalsh.com/privkey.pem;
Next I created a server block to redirect https://www.lewiswalsh.com to https://lewiswalsh.com and one to redirect the insecure versions of those domains:
server {
    listen       443 ssl;
    server_name  www.lewiswalsh.com;
    return       301 https://lewiswalsh.com$request_uri;
}
server {
    listen       80;
    server_name  lewiswalsh.com www.lewiswalsh.com;
    return       301 https://lewiswalsh.com$request_uri;
}
Restart Nginx and all should be well.
sudo service nginx restart
Since Let's Encrypt certificates expire every ninety days you'll need to manually renew. Eventually this can be automated, but for now just run the following command again when your certs expire:
./letsencrypt-auto certonly
While you're at it, you may as well beef up the Diffie-Hellman cyphers to get that A-grade SSL.